简介
本文介绍Tomcat的安装和使用。
下载及配置
下载
配置
配置文件:conf/server.xml
| 配置项 | 含义 | 默认值 |
| <Connector port=”8080″ protocol=”HTTP/1.1″ connectionTimeout=”20000″ redirectPort=”8443″ /> | 端口 | 8080 |
Idea配置Tomcat
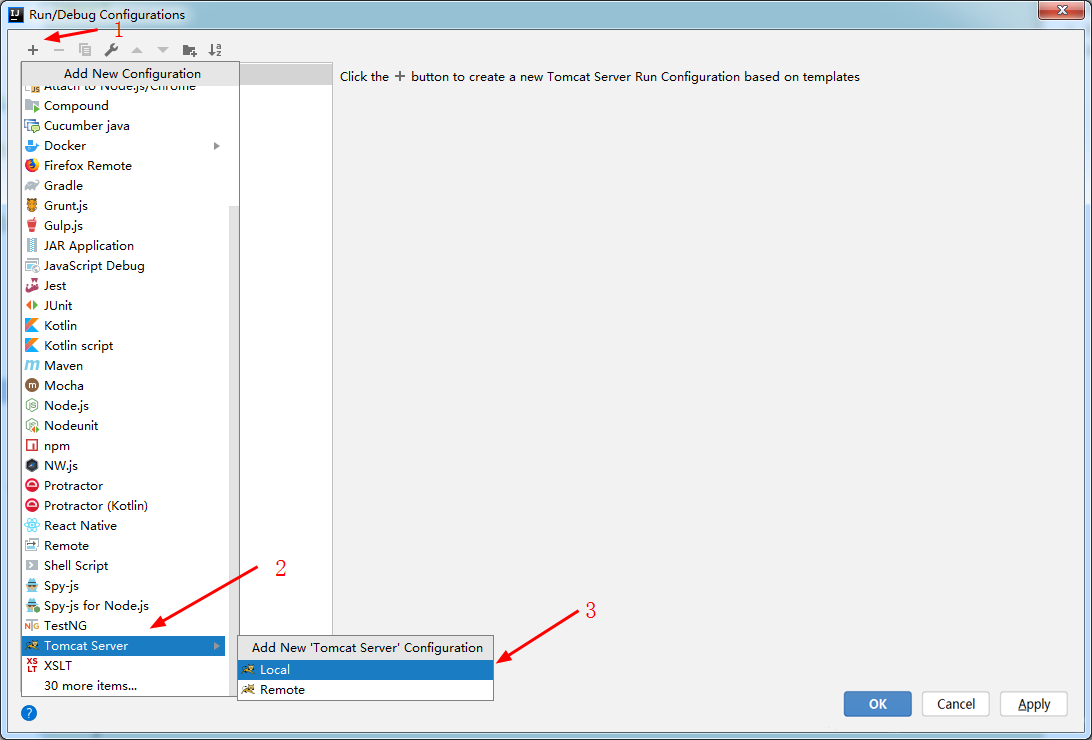
添加Tomcat配置
Run=> Edit Configurations=> 左上角“+”=> Tomcat Server=> Local
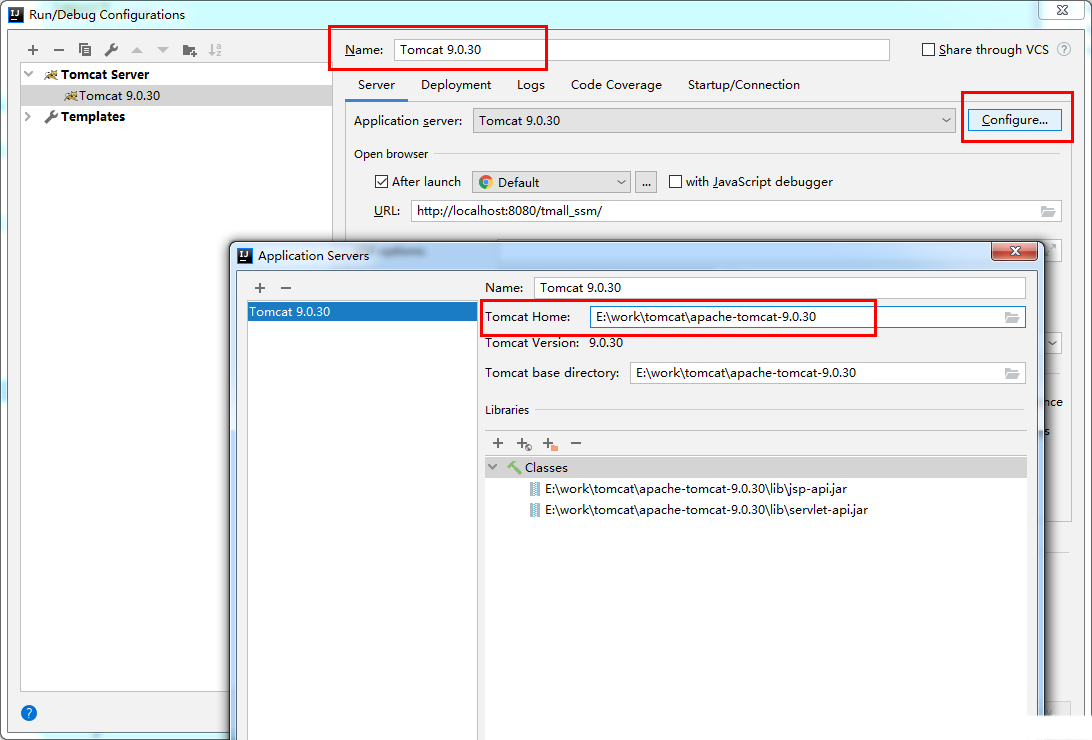
修改Tomcat配置细节
Run=> Edit Configurations=> 选中上一步结束后生成的Tomcat配置=>
Name=> 输入名字
Server=> Application server=> 右侧“Configure”=> “Tomcat Home”输入路径(例:E:\tomcat\apache-tomcat-9.0.30)
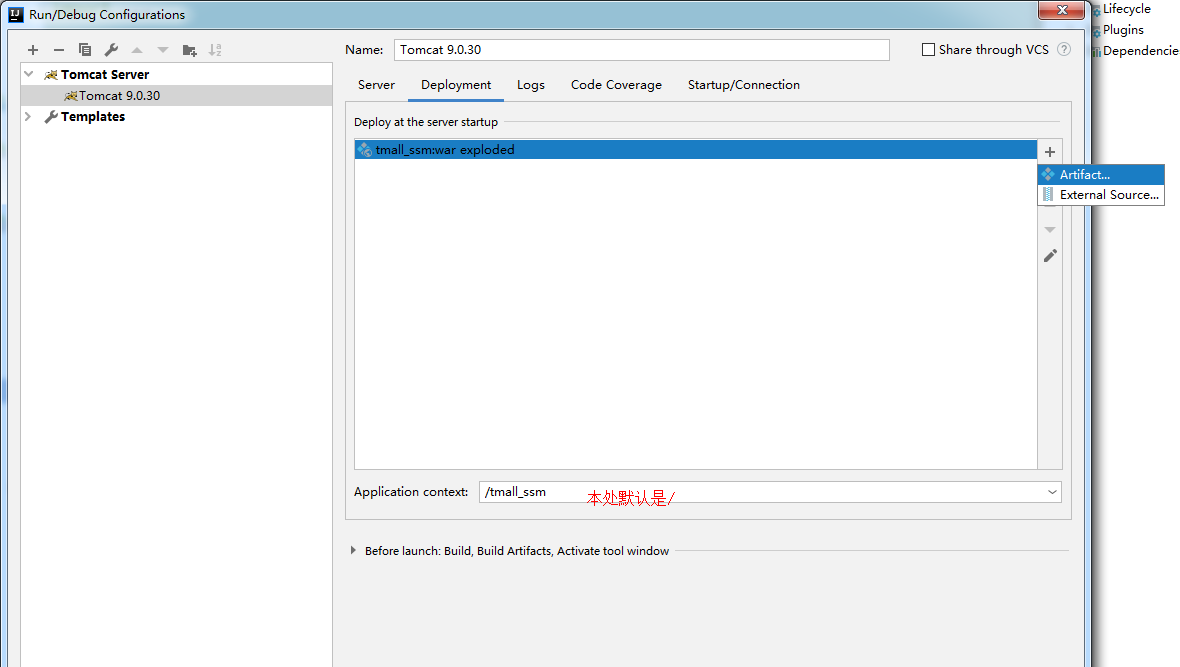
指定当前项目部署到Tomcat中
Run=> Edit Configurations=> 选中上一步的Tomcat配置=> Deployment=> 右侧“+”号=> Artifact=> 自动生成 xxx.war
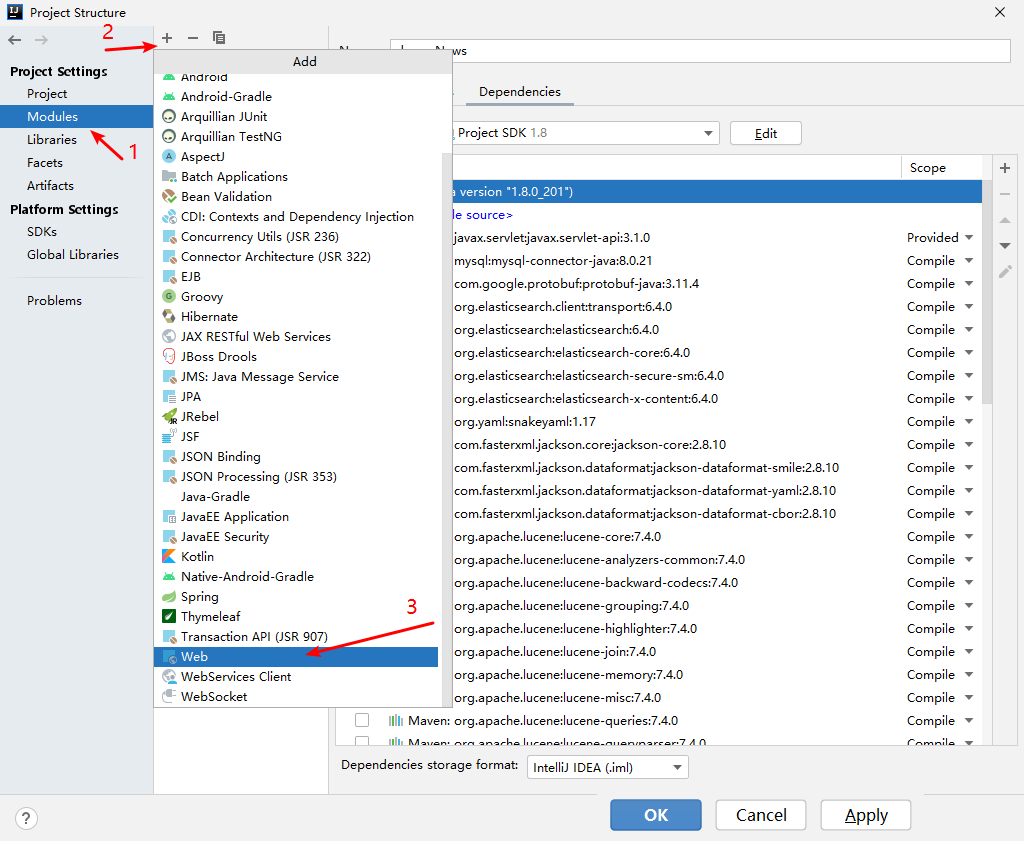
Tomcat没有Artifact解决方法
步骤1:给Module添加web
File=> Project Structure=>Project Settings=> Modules=> 中间一列选中Modules=> 中间最上边“+”=> Web
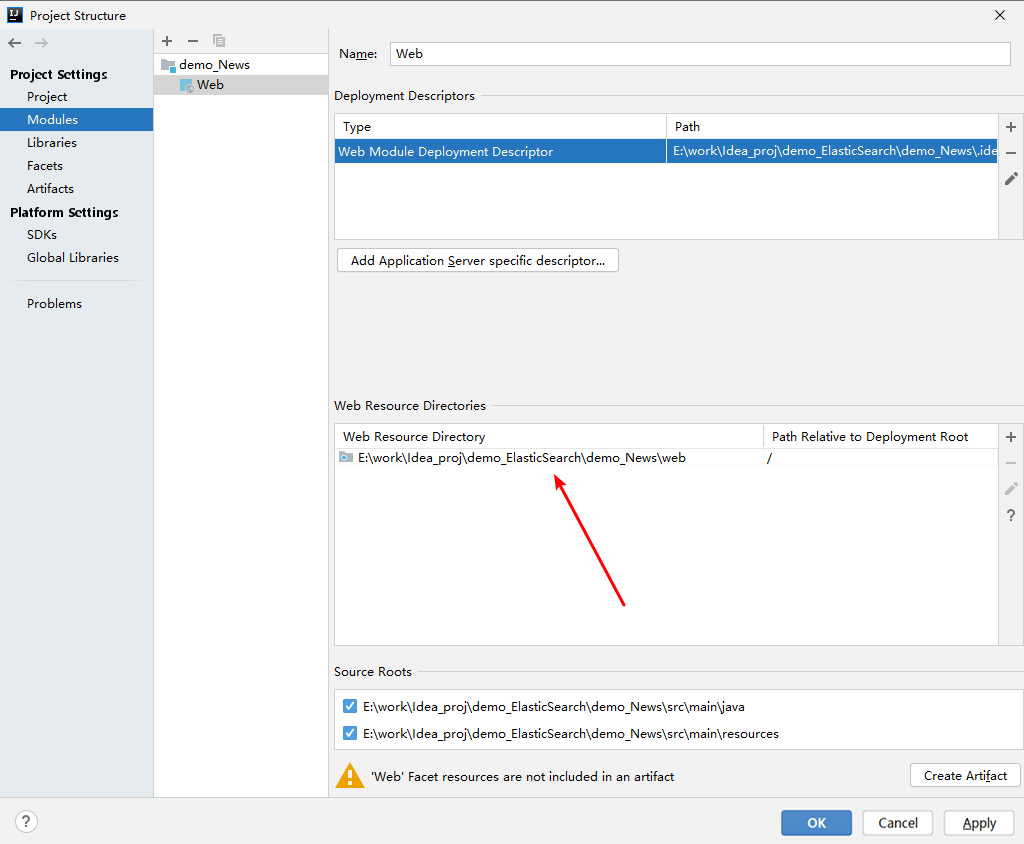
步骤2:配置MODULE的WEB
File=> Project Structure=>Project Settings=> Modules=> 中间一列选中Modules的Web=> 配置“Web Resource Directories”
注意:“Web Resource Directory”对应自己工程存放css、WEB-INF(下边有web.xml)、jsp的上层路径
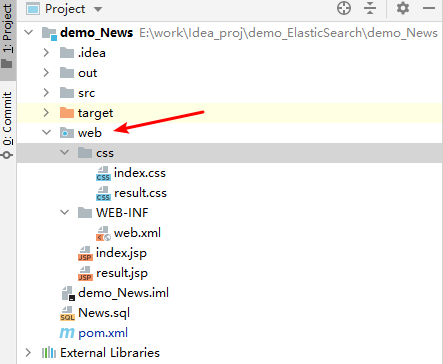
我的web路径如上图所示,所以配置路径如下:
步骤3:创建Artifact
File=> Project Structure=> Project Settings=> Artifact=> 中间一栏“+”=> Web Application:Exploded=> From Modules
Idea运行Tomcat
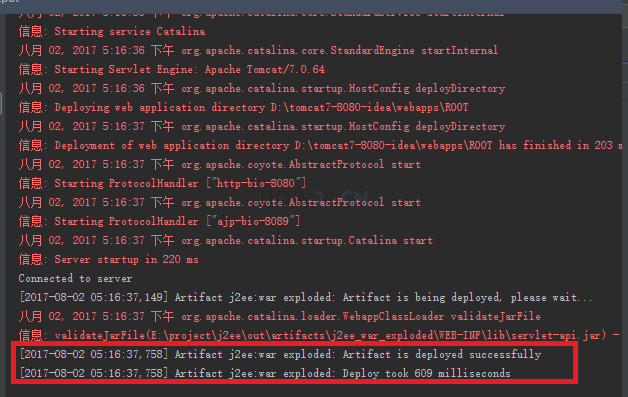
点击绿色按钮

出现xxx.war deployed successfully的时候,就表示部署成功了

请先 !