简介
本文用示例介绍Spring中某个接口有多个实现类时该如何注入。
问题复现
需求:一个支付接口,有两个实现:支付宝支付、微信支付。想调用支付宝支付方法。
接口
package com.knife.tmp;

public interface Pay {
    void doPay();
}
实现
支付宝
package com.knife.tmp.impl;

import com.knife.tmp.Pay;
import org.springframework.stereotype.Component;

/**
 * 支付宝支付
 */
@Component
public class AlipayImpl implements Pay {
    @Override
    public void doPay() {
        System.out.println("支付宝支付");
    }
}
微信支付
package com.knife.tmp.impl;

import com.knife.tmp.Pay;
import org.springframework.stereotype.Component;

/**
 * 微信支付
 */
@Component
public class WeChatImpl implements Pay {
    @Override
    public void doPay() {
        System.out.println("微信支付");
    }
}
Controller
package com.knife.controller;

import com.knife.tmp.Pay;
import org.springframework.beans.factory.annotation.Autowired;
import org.springframework.web.bind.annotation.GetMapping;
import org.springframework.web.bind.annotation.RestController;

@RestController
public class PayController {
    @Autowired
    private Pay pay;

    @GetMapping("/pay")
    public String pay() {
        pay.doPay();
        return "test success";
    }
}
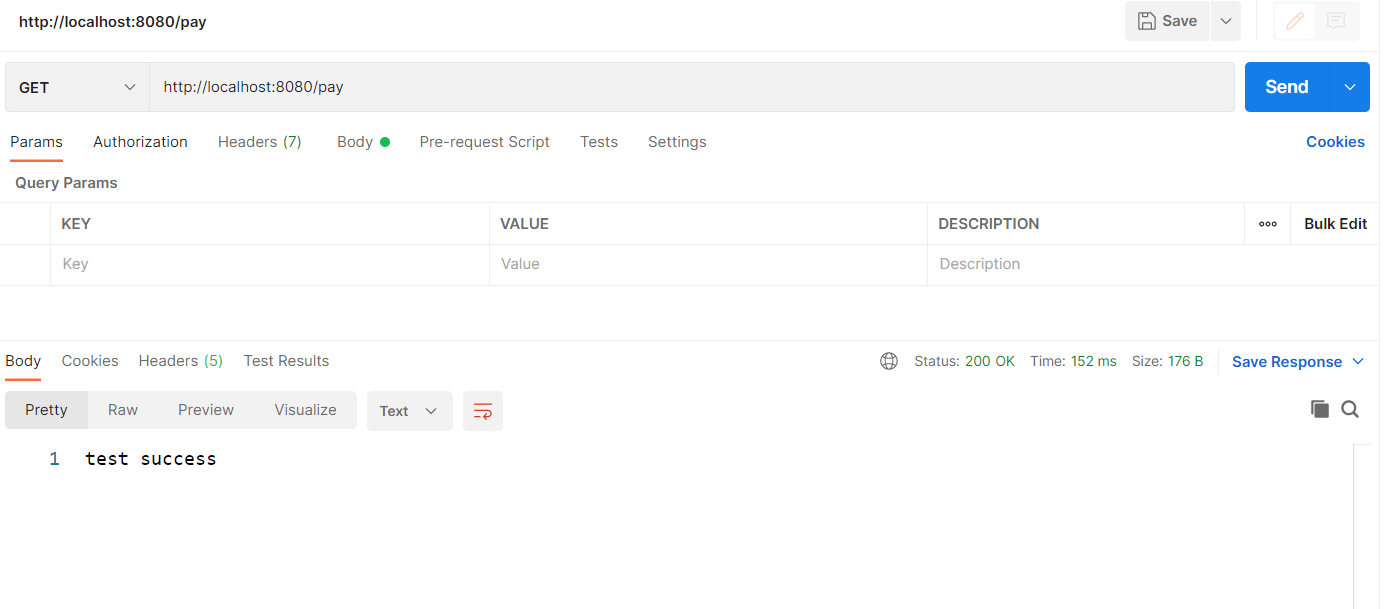
测试
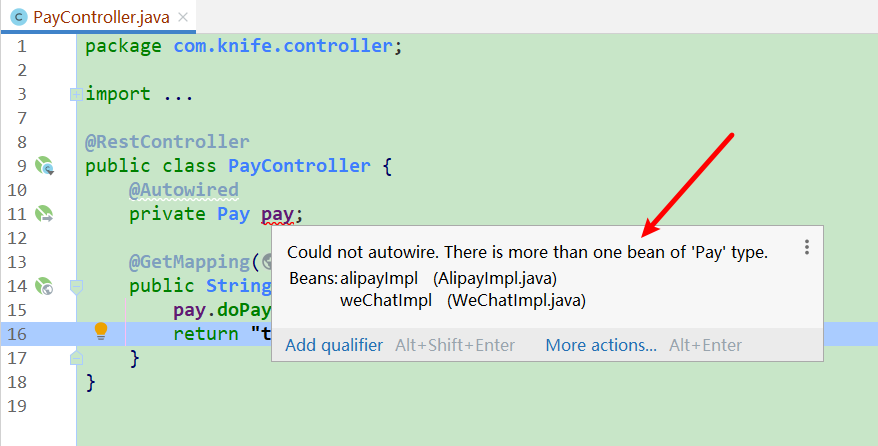
首先,还没运行,就可以看到Idea红色波浪线提示:
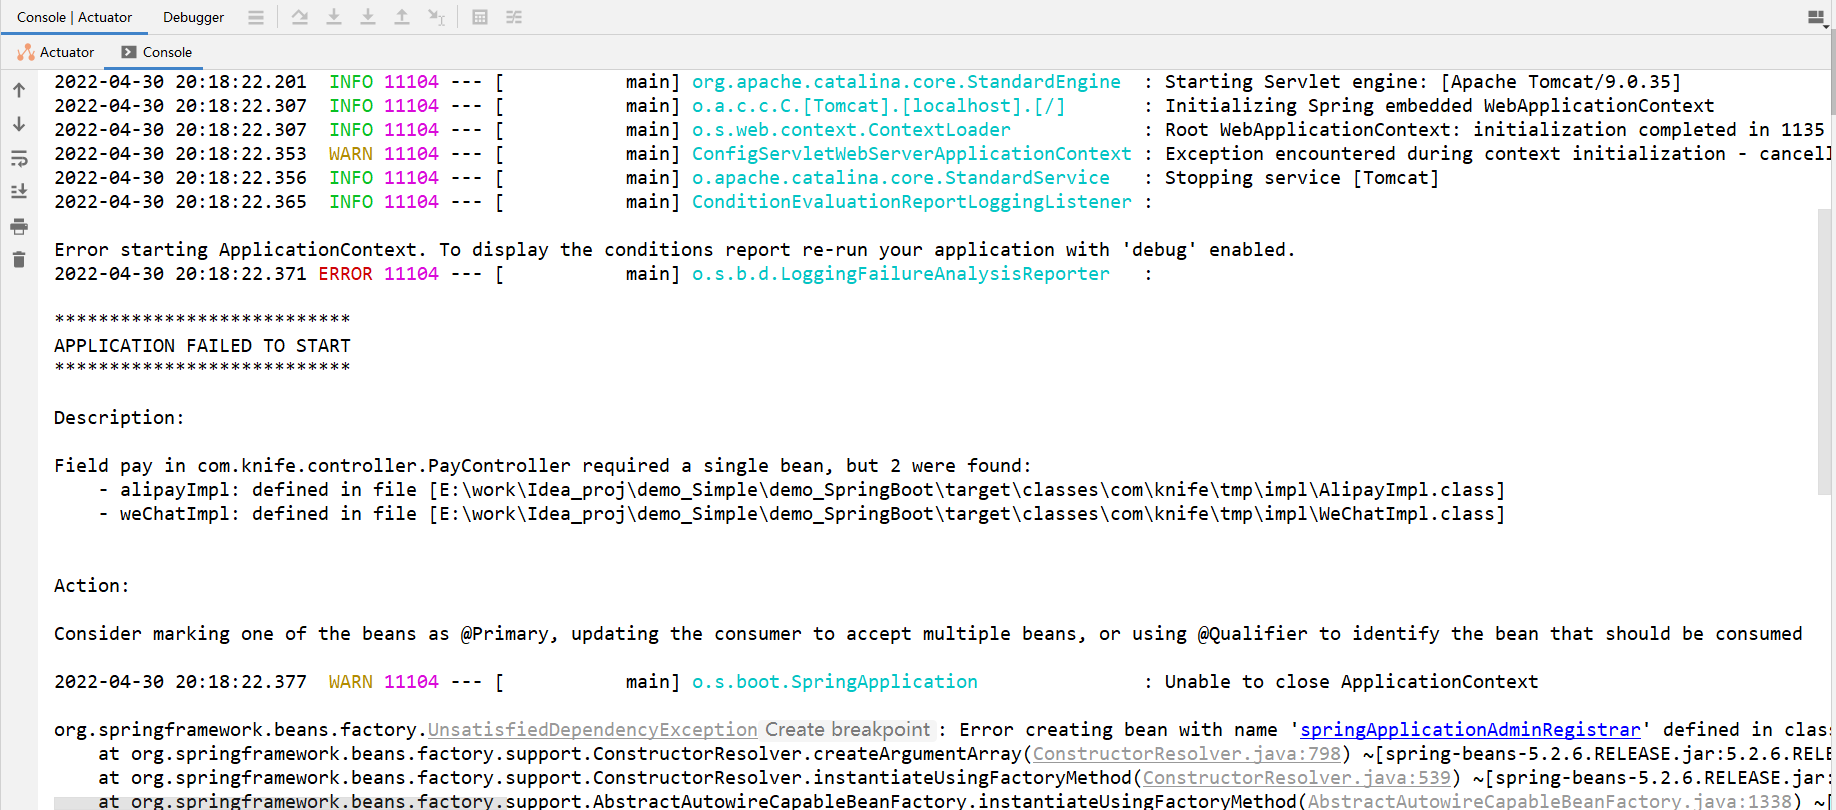
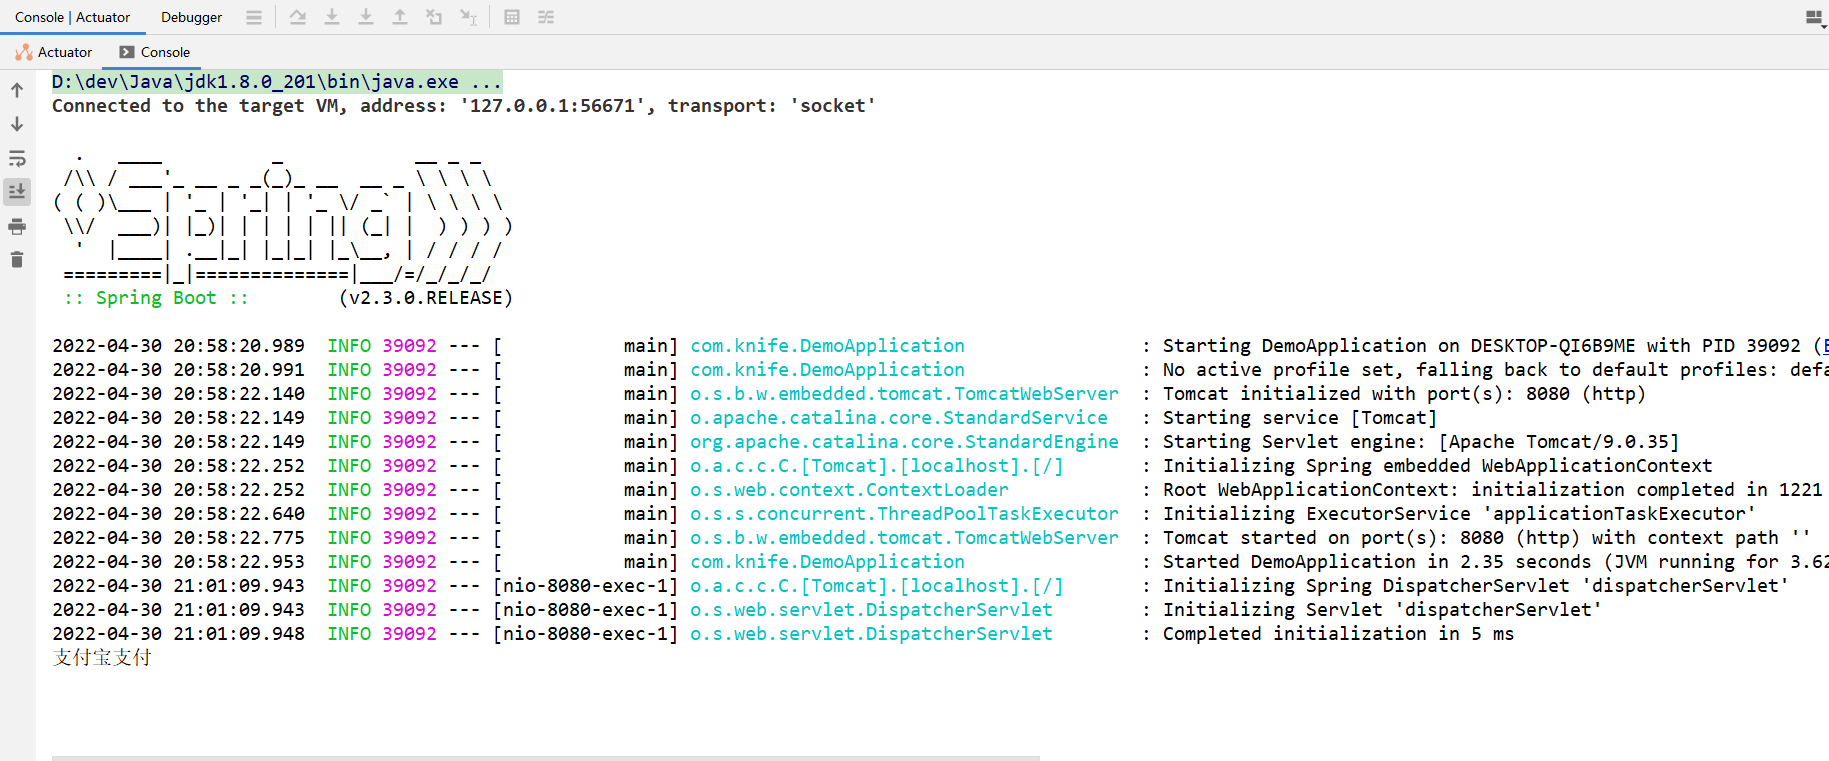
运行结果:
Description:

Field pay in com.knife.controller.PayController required a single bean, but 2 were found:
    - alipayImpl: defined in file [E:\work\Idea_proj\demo_Simple\demo_SpringBoot\target\classes\com\knife\tmp\impl\AlipayImpl.class]
    - weChatImpl: defined in file [E:\work\Idea_proj\demo_Simple\demo_SpringBoot\target\classes\com\knife\tmp\impl\WeChatImpl.class]

Action:

Consider marking one of the beans as @Primary, updating the consumer to accept multiple beans, or using @Qualifier to identify the bean that should be consumed
如下图:
原因分析
@Autowired是通过类型来注入的。以上边的示例来说,@Autowired注入一个Pay接口,此时Spring会查找所有实现了Pay接口的bean,此时发现了两个:AlipayImpl,WeChatImpl,然后就会报错。
解决方案1:@Primary
说明
将@Primary放到接口的某个实现类上边。这样如果此接口有多个实现类,则会注入有@Primary的实现类。
实例
相对于“问题复现”,只修改支付宝实现类,在上边添加@Primary,如下:
package com.knife.tmp.impl;

import com.knife.tmp.Pay;
import org.springframework.context.annotation.Primary;
import org.springframework.stereotype.Component;

/**
 * 支付宝支付
 */
@Primary
@Component
public class AlipayImpl implements Pay {
    @Override
    public void doPay() {
        System.out.println("支付宝支付");
    }
}
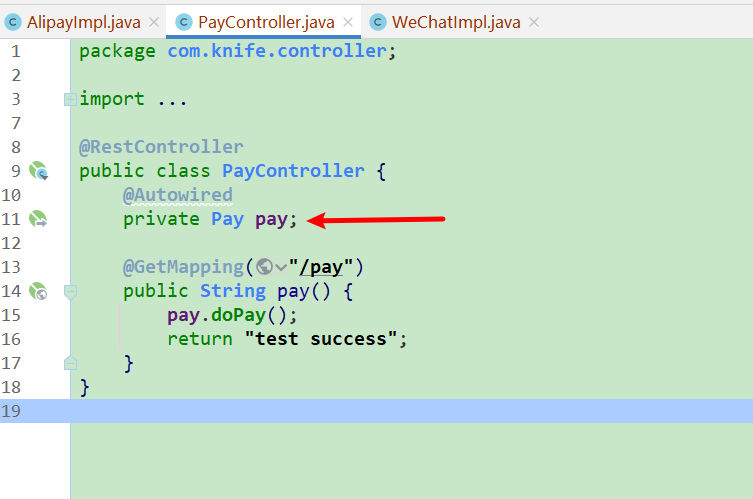
这样Controller就不会再有红色波浪线:
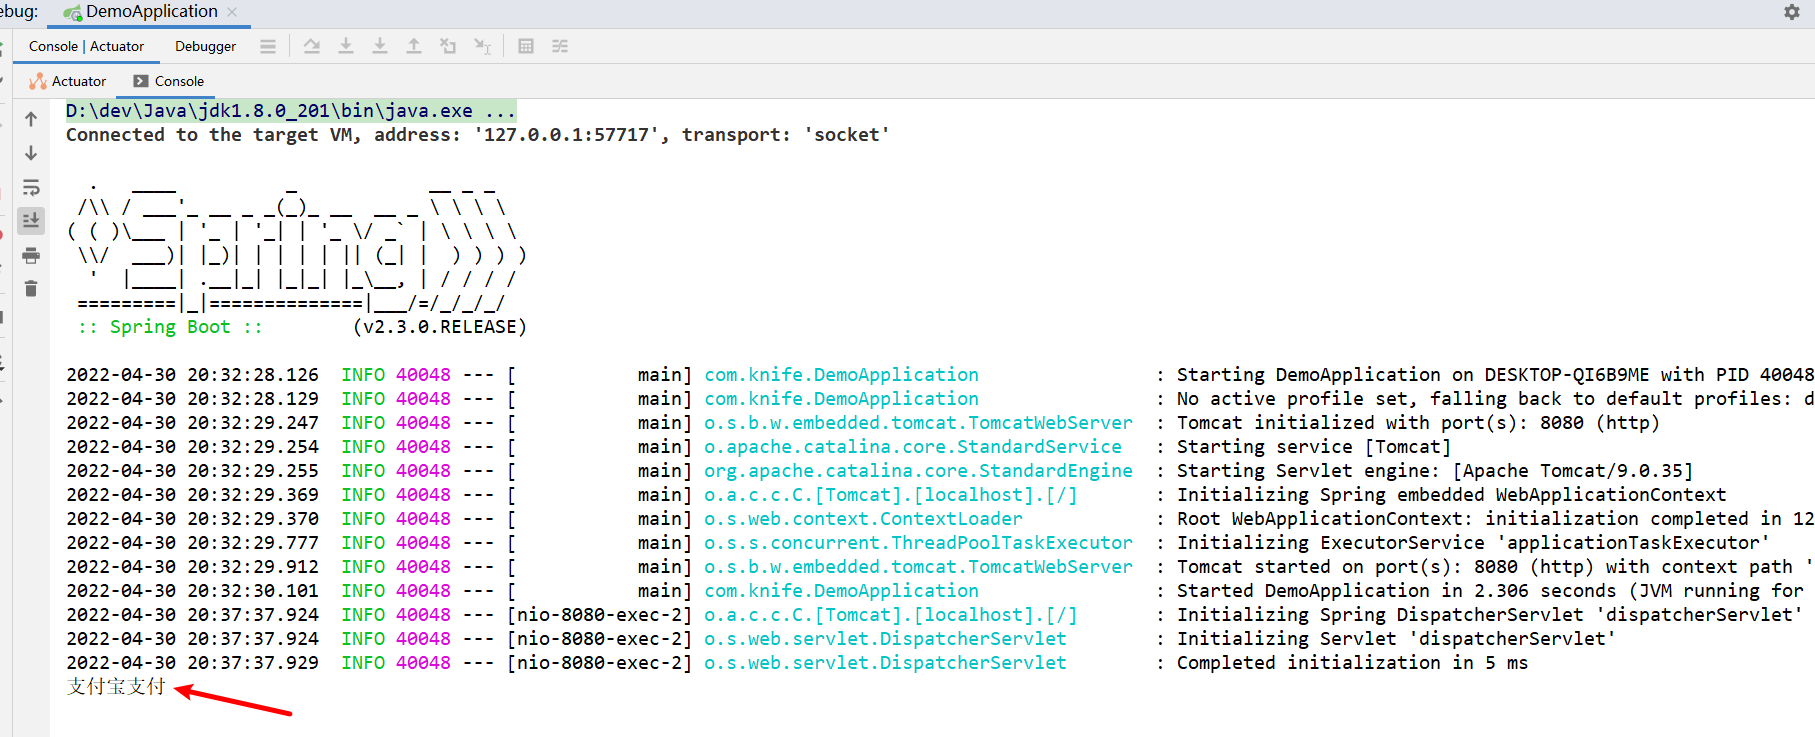
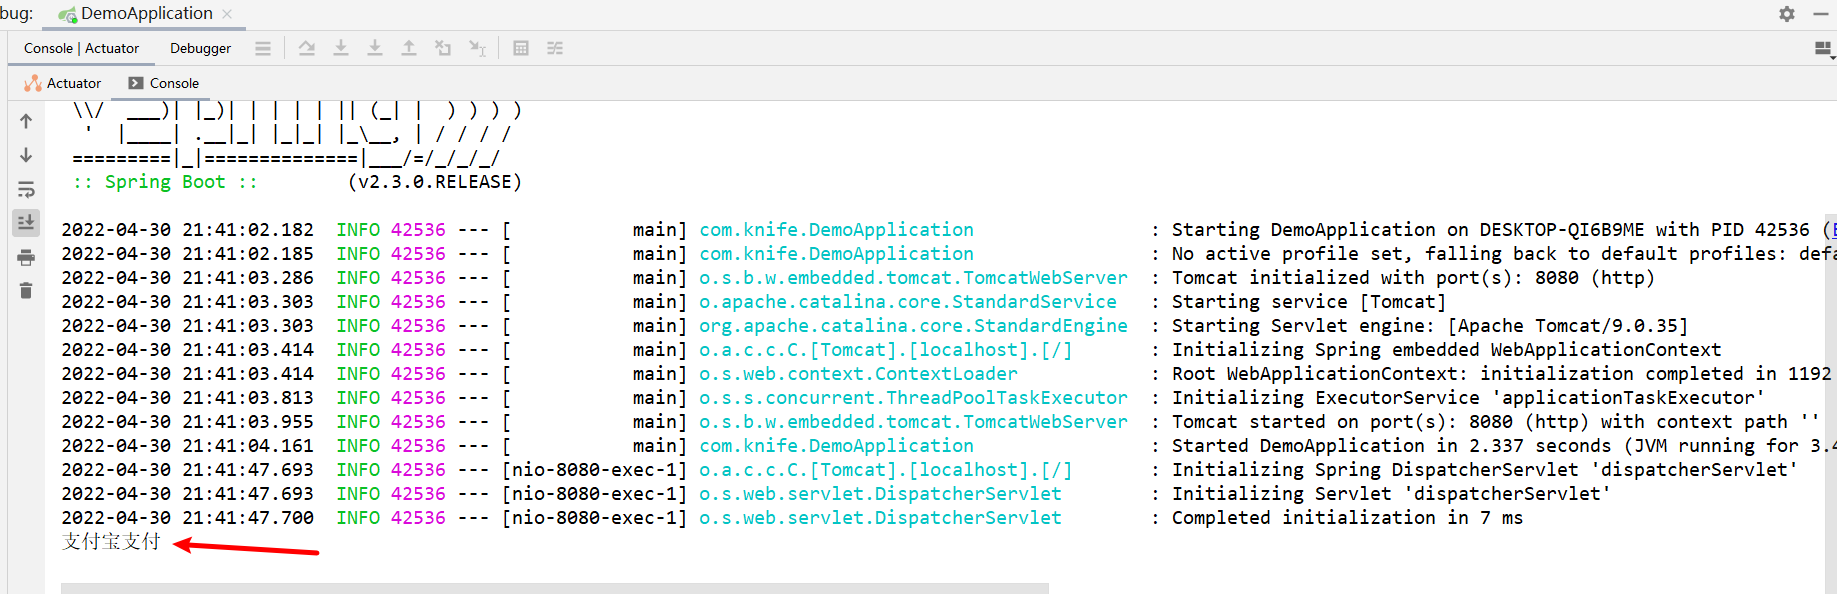
运行结果
启动成功。

后端结果
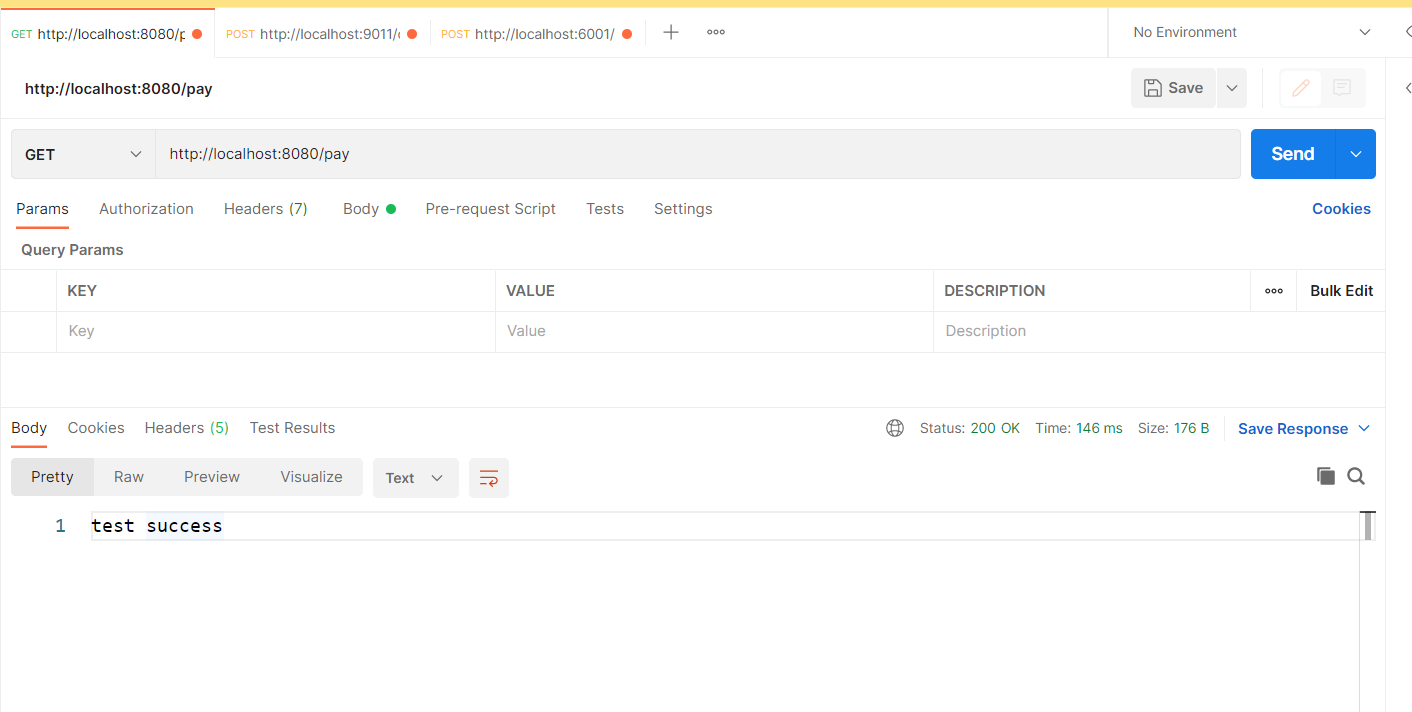
解决方案2:value属性 +@Qualifier
说明
在接口的某个实现类上边的@Component里指定value,例如:@Component(“xxx”),使用@Autowired注入的地方用@Qualifier(“xxx”)来指定(xxx表示@Component里的value)。这样如果此接口有多个实现类,则会注入@Qualifier(“xxx”)指定的实现类。
实例
接口
package com.knife.tmp;

public interface Pay {
    void doPay();
}
支付宝实现类
package com.knife.tmp.impl;

import com.knife.tmp.Pay;
import org.springframework.stereotype.Component;

/**
 * 支付宝支付
 */
@Component("alipay")
public class AlipayImpl implements Pay {
    @Override
    public void doPay() {
        System.out.println("支付宝支付");
    }
}
微信支付实现类
package com.knife.tmp.impl;

import com.knife.tmp.Pay;
import org.springframework.stereotype.Component;

/**
 * 微信支付
 */
@Component("wechat")
public class WeChatImpl implements Pay {
    @Override
    public void doPay() {
        System.out.println("微信支付");
    }
}
Controller
package com.knife.controller;

import com.knife.tmp.Pay;
import org.springframework.beans.factory.annotation.Autowired;
import org.springframework.beans.factory.annotation.Qualifier;
import org.springframework.web.bind.annotation.GetMapping;
import org.springframework.web.bind.annotation.RestController;

@RestController
public class PayController {
    @Qualifier("alipay")
    @Autowired
    private Pay pay;

    @GetMapping("/pay")
    public String pay() {
        pay.doPay();
        return "test success";
    }
}
测试
启动成功。
后端结果
解决方案3:指定属性名(不推荐)
说明
@Autowired提供这样的规则,首先它会根据类型找到对应的Bean,如果对应类型的Bean不是唯一的,那么它会根据其属性名称和Bean的名称进行匹配。如果匹配得上,就会使用该Bean;如果还无法匹配,就会抛出异常。
所以,在注入的地方,将属性名设置成与bean名字一样即可。
实例
接口
package com.knife.tmp;

public interface Pay {
    void doPay();
}
支付宝实现
package com.knife.tmp.impl;

import com.knife.tmp.Pay;
import org.springframework.stereotype.Component;

/**
 * 支付宝支付
 */
@Component
public class AlipayImpl implements Pay {
    @Override
    public void doPay() {
        System.out.println("支付宝支付");
    }
}
微信支付
package com.knife.tmp.impl;

import com.knife.tmp.Pay;
import org.springframework.stereotype.Component;

/**
 * 微信支付
 */
@Component
public class WeChatImpl implements Pay {
    @Override
    public void doPay() {
        System.out.println("微信支付");
    }
}
Controller
package com.knife.controller;

import com.knife.tmp.Pay;
import org.springframework.beans.factory.annotation.Autowired;
import org.springframework.web.bind.annotation.GetMapping;
import org.springframework.web.bind.annotation.RestController;

@RestController
public class PayController {
    @Autowired
    private Pay alipayImpl;

    @GetMapping("/pay")
    public String pay() {
        alipayImpl.doPay();
        return "test success";
    }
}
测试
启动成功。
结果:
后端结果

请先 !